Showing posts with label Dressmaking. Show all posts

Saturday, September 01, 2018

Her Capsule Wardrobe 


A few weeks ago, in passing, my mum told me she needed to go shopping for clothes as she had nothing to wear for her trip to Ireland next week. So I decided I would make her some pieces that would go together. I looked for inspiration on Instagram for sewing over 60 but there are very few posts. The ladies who had tagged themselves seemed to like the merchant and Mills Patterns. I have to admit I have not particularly been drawn to them. Like many people I didn't really like how they had marketed their patterns. However the versions that were online looked comfortable and classic which was a look that I thought my mum would like. So I took the plunge and bought their workbook. I bought 8 metres of fabric and started sewing! Originally I had planned on making all of it from the merchant and Mills Workbook however I decided that fitted waistband might be problematic on trousers that I wasn't actually fitting.

The fabrics are a striped polycotton, a very soft denim and a beautiful blue linen. All from my local sewing shop, Samuel Taylors.

The trouser pattern I eventually chose, is actually the Tilly and the Buttons PJ bottoms Margo, but I added pockets and a mock fly. They needed about 4 inches off the bottom but I think they have turned out pretty well and may make more of these in the future as they a really quick make.

The linen blouse is the only unique fabric of the collection. This is Heron from the Workbook. My friend Mel from Ditsy Tulip had warned me about the pivot points on the collar so I didn't have any problems with them. However the ties!!! What a terrible way of tackling them! It took several hours to turn them the right way out and my fingers hurt for about two days afterwards. It is however the best top out of the ones that I made. I think it looks pretty and the colour is perfect on my mum.

The next top is Curlew also from the Workbook. I would have loved to have made a long sleeved version, however this tiny tank top is bias cut so eats fabric. It is a little big on her, under the arms, and I think I really need to learn how to do a FBA for any future tops I make for her. It works ok though as she is happier with a long sleeve tee-shirt underneath. The bias binding is a bit of the striped fabric. I really enjoyed the look of this and am dreaming of a liberty trim on a future versions.


The rest of the striped polycotton became the Saltmarsh skirt also from the workbook. It is a super easy make, with a sewn waistband,pockets and a drawstring. I took 3 inches from the bottom and put it together in a couple of hours.


My mum thankfully is pleased with the pieces I have made. I count myself very lucky that she let me take photos as she is usually very camera shy. The photos were taken five minutes walk from my house.

There are two more patterns in the book another Tank with a racer back ( I can't imagine my mum wearing that) and a linen Jacket a long and short version which I quite fancy making the long at some point. Red linen mmmm!

WE are very lucky to live here!


As for the scraps? I decided to make one of my #2018makenine. Datura by Dear and Doe. For some reason I had got it into my head that this pattern was going to be complicated. Again it is bit a big under the arms but I really like the pattern it is a very easy make ( the buttons are just sewn on!) and is perfect for small bits of Fabric.


If you are wondering about the shawl it was designed and made by my very clever friend Olga a few years back you can get the pattern here.

I am now dreaming of a Capsule wardrobe for me. Luckily Sew Over It have just obliged with their Work To Weekend Collection whch I am busy printing out!

Till Next Time

A x

Sunday, March 04, 2018

Coffee and Cocktails #dayandnightdresschallenge


I did kind of mention this way back at the beginning of February but I had kind of decided that I just wouldn't get around to it ah well these things happen. Then the weather gave me snow days!!! Yippee! My children are too big to need me to go out and play in the snow so I have had three lovely extra days. Ok so I didn't get to spend all of it sewing but on Friday morning I decided that I would go for it and complete the challenge.


The Belledone dress by Dear and Doe was bought for my birthday last summer and it has been on my things to do list since then. One of the reasons that I hadn't got around to making it was quite simply the bias binding. All of the versions that I had seen, that I loved, had extra binding on the back detail. Well not only do I hate playing with bias binding I just couldn't work out how to add it for this detail so I kind of ended up procrastinating and just ignoring it.

Giving myself such a short deadline I didn't have time to fiddle about so I did two things that I rarely do.

1. I cut the pattern ( I can always get net printer to print me a pristine new one)

2 and this which is worse I cut a size smaller than I would usually make and kept everything crossed (I usually make it too big and then take it in)!

Luckily both of these extravagances paid off although I did have to adjust the zipper seam allowance in order to pull it up my back.

For Coffee I am wearing a Rose and Hubble cotton that I bought back in September from the Pound a yard store in Dewsbury. I had two metres and with a slightly lengthened skirt I had just enough. knew I wanted the bias binding to be a feature and when I saw this hot pink on Saturday In my local Samual Taylors I knew I had found it.

So if you are interested to add bias binding to the back just follow the folding instructions for the back pieces and then add the bias binding over the top. I also decided to add it to the waistband. For the bias binding at the waist I folded the bias binding in half and then sewed that seam with a 1/4 inch seam allowance instead of the usual. 


The dress turned out exactly as I envisaged. My DH said it was too nice for a coffee date and my daughter said it was the nicest thing I have ever made myself. In all honesty, the bias binding isn't perfect ( anything but) I think it is only me that will notice!!

For Cocktails ( or for a dinner date with my husband later this month) I used the scraps leftover from my youngest daughter's prom dress. 

I trimmed it with black bias binding from my stash. This bias binding is synthetic and was much easier to work with but even this wasn't perfect. I realise it probably won't get that much wear as it really isn't that practical. Who cares ! 


I love this dress not only is it really pretty but it makes me think of my children at Prom.


Both dresses were made exactly to the pattern... well except for the extra bias binding and extra skirt length:) It was really nice making two of the same thing at once. I used to do it all the time when the twins were little. It actually doesn't take any more time than making one. I maybe should keep that in mind for my future makes!

Till next time happy stitching!!


Arianwen x

Sunday, February 18, 2018

If you give a man a fish....

Evening all,
be prepared for a photo filled post as I am very proud of this project and I was in charge of the camera rather than the sewing machine!


My husband has been, over the years, fairly instrumental in my sewing. Not that he is ecstatic with my fabric stash, or the pins strewn around the dining room, but he did buy my Janome 9000 for me and he critiques what I have made. However he has never wanted me to sew anything for him as he says he has clothes.


However he has said as a throw away comment many times " I would like to learn how to use the sewing machine". I think because he has never jumped up and down about it, his learning has always gone to the back of the queue. Anyway I was kind of stuck for the perfect Christmas present and decided teaching him would be perfect.


He had in mind that maybe he would make a cushion or something really simple. Now at 6'4 clothes that fit are hard to come by so I figured he would get more pleasure out of a beautiful garment, that he had made himself, that fit .

I showed him all of the wonderful Thread Theory Patterns and some of the great projects that people had made.

We decided on the Belvedere Waistcoat, I got it printed by NetPrinter as I hate the sticking and assumed that the cut and paste method might send him running for the hills. Then we went and chose fabric together during the Christmas Holidays from the amazing Fabworks in Dewsbury.

I pointed him towards the right types of fabrics and he chose. I was very surprised by the purple, as although he isn't particularly conservative in his clothing choice he wouldn't usually choose purple or pinks, but I actually think it was the perfect choice!


He was very precise and meticulous about every aspect of the make, it was interesting to see how unlike me he doesn't just accept the instructions but strives to know what will happen to his fabric before he has stitched anything.

I have to say that the instructions in the pattern were very good and the sew a long online definitely helped with the knowing!
Obviously until you have made a welt pocket you really cant understand, but the look of amazement he turned the cloth on the ironing board and saw pockets was just incredible.

He is also the only sewer I have ever met who doesn't swear when un-picking buttonholes! We followed the pattern to letter except we moved the "gap" at the bottom to the back of the lining as he doesn't like hand sewing and the closing could then be done on the machine.

His attention to detail has paid off and he has created a pretty amazing first piece of clothing. He has plans for more makes so I really hope he continues even if it does mean I have to share my machine.


So what do you think? Are you impressed? Any suggestions of what he should make next or plans for his wardrobe?


Till next time

Happy stitching

A

Wednesday, January 17, 2018

Sunny Dress/Tunic


Evening all,as you probably read I am taking part in the instagram challenge of #Sewmystyle2018 and January's pattern  was the Sunny dress/Top it is a very basic Jersey Dress pattern from the Friday Pattern Company. It  is really a summer type dress or top and I would have to say with the shaped hem neither version are really my style but I figured as it was the first of the 12 patterns I would give it a go.  I am trying to work some of this challenge from stash. This one is  some wool jersey that I got given when I met up with the #sixdodewsbury a group of six   lovely ladies that I met at Sew up North. I made the medium for this version which was pretty much exactly my measurement and then added a neckband as I felt without it , the neckline would be very low.

I think it turned out OK and I have had some compliments for it. I think it would probably make quite a good layering piece as it is quite warm over leggings and boots .... but I just don't love it!
I think the sleeves are the wrong length and too wide and because of that  honestly don't know how much wear it will get.

Anyway not to be beaten I decided to go to the Monday market and some lovely red velour caught my eye.  I needed something to wear to a presentation evening  and I decided  a red  party dress was just what I needed. This time I lengthened it and got rid of the curved hem. I went down a size so it is very clingy and I extended the sleeves to wrist length.

I think I could of probably taken more off the width of the sleeve and as the photos prove I should of probably made them three quarter length as without fail I end up pushing them up! I am quite pleased with this version. It is comfy and easy to wear which is my favourite type of clothing. So there you go two very different dresses from one very basic pattern. Which is your favourite? Did you make one? I would love to see!

Till next time

Arianwen

Wednesday, August 16, 2017

Lovely Lady Liberty!


 Morning all, 
in case you hadn't noticed there is steam coming out of my sewing machine at the moment. Summer holidays and children who can fend for themselves ( The twins are now 16 can you believe it)  means that I have been lucky to have lots of free time and I am enjoying every minute of it.

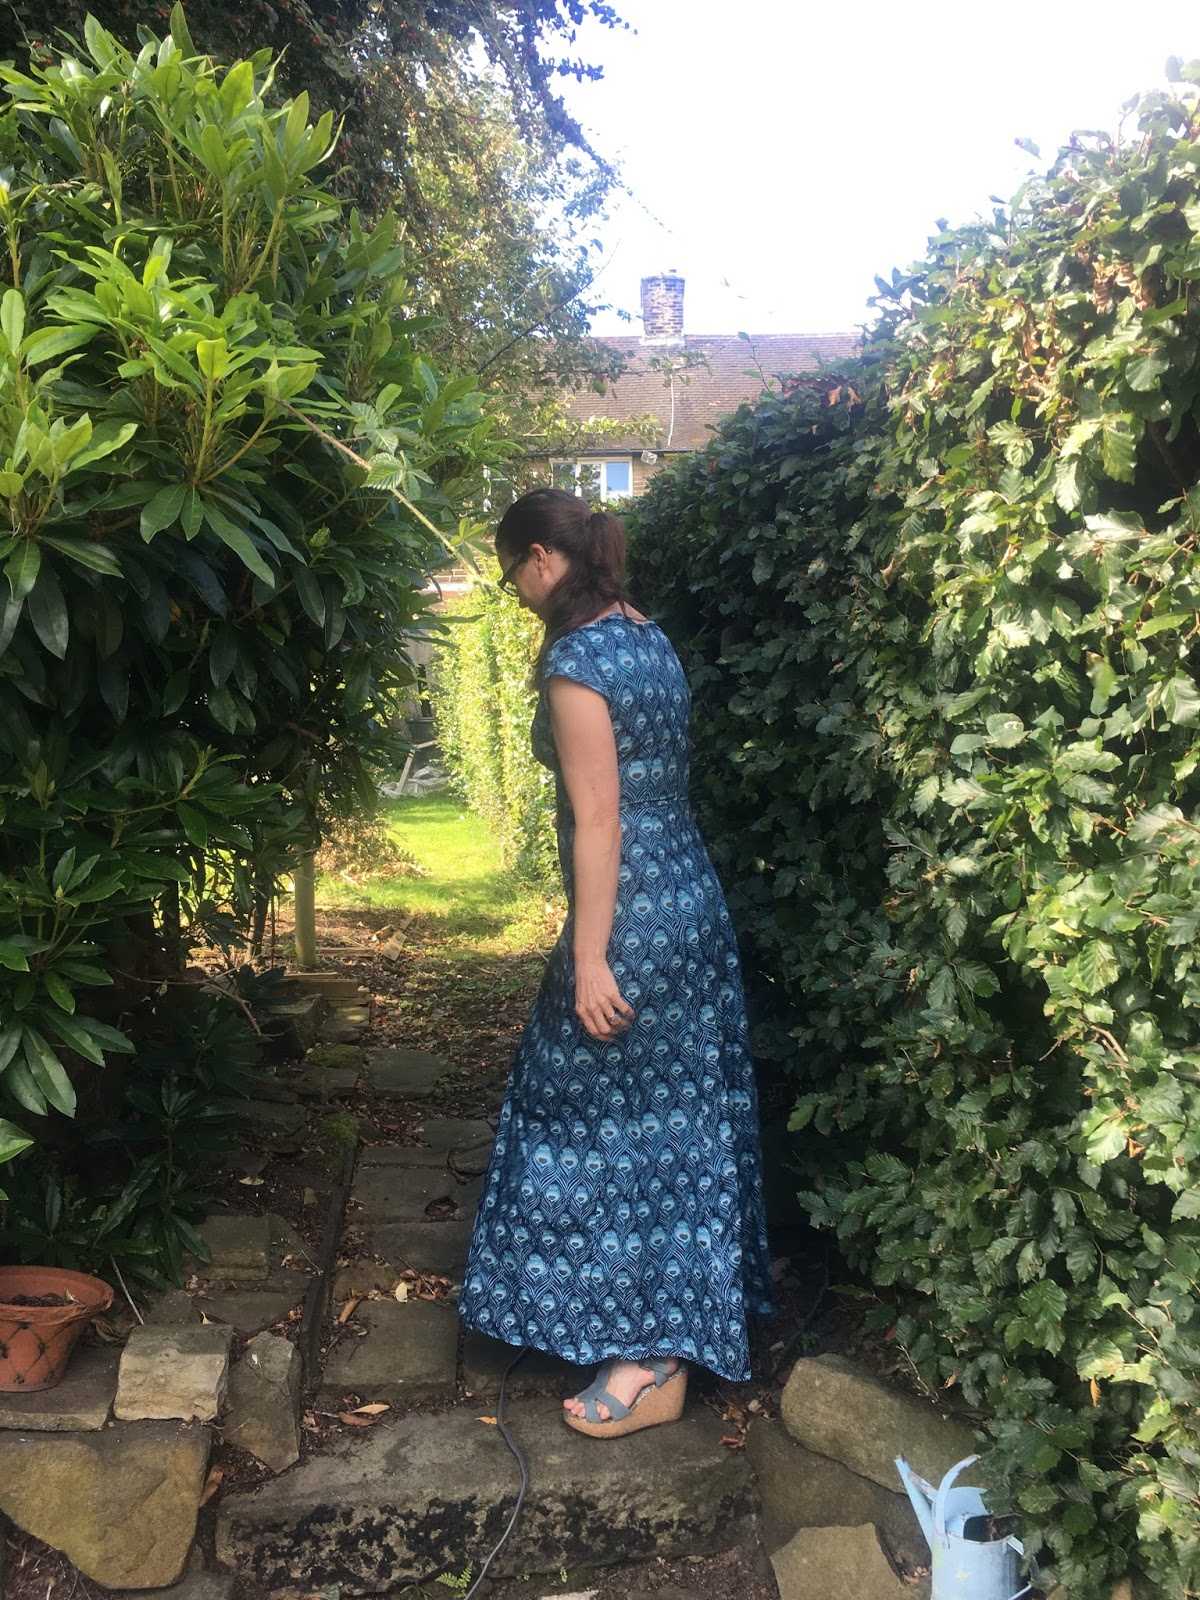
So this is Anna! This is the Anna that I planned! An elegant easy to make pattern in harmony with iconic Liberty peacock feather fabric that I bought from Fabworks months back  and because I bought enough for that ginormous skirt I still have some left yippee!

After my last version that I do really love, I studied lots of other versions online and realised that mine looked a lot drapier in the neckline. So I took a deep breath  and  tweaked the shoulders and tops of the grown on sleeves back down to a size 10 leaving everything else at a 12 and I have to say that the fit is perfect!


I didn't do french seams as my fabric, even after washing was a bit stiff, so overlocked the raw edges and then added a bit of  luxury by adding a lovely silky bias binding to the armholes and facings.

I finished this last week and have worn it lots already. I omitted the split  from this version which makes it very wearable for pretty much all occasions. I left the length the same as the last one and so far so good I haven't fallen over it!

I can't actually believe it took  me so long to make this  pattern up. If you haven't tried it yet definitely give it a go you won't be disappointed ( Although if you are making the long skirt check the length before you start).


I am planning at least one more Anna dress this year maybe with a circular or half skirt for the cooler months, but for now at least I am still stitching a summer wardrobe!

Till next time when I have a couple of tops to show you.


Tuesday, August 15, 2017

The Laneway Dress - An Honest Review.


Well today is something a little bit different from me, a review of a pattern.

Back in early June Jennifer Lauren Handmade released the Laneway dress and  I thought, yes I really like that! It had three sets of  interesting elements that I was drawn to. The underbust pleats reminded me of the Anna Dress from ByHandLondon, which I hadn't made at that point and K4097 by quick sew which I had! The collar which is very similar to the Rooibos dress by Colette which I have made here. But most importantly it had sleeves which reminded me of the glorious Anna Hack by the very talented Lynne at Ozzy Blackbeard.

Anyway at the end of July Jennifer put a request up for honest reviewers for her Laneway dress and she specified non gushing. My first thought was how refreshing, because like many others I read reviews of  the independent patterns and without fail they gush. They fail to mention the length of bodices and the lack of pattern markings. As a general rule they don't tell you much about the pattern at all just about how much they love their new garment. Don't get me wrong I can understand why, I mean if you are given a free pattern, you are going to want to be chosen the next time too....Not me I rarely gush. So I  excitedly signed up and sadly wasn't successful.


Never mind I have birthday money and some beautiful new fabric that my clever husband bought me from Seasalt fabrics ( definitely worth checking out). So I bought it! The initial download cost just over £10.00 which is slightly more expensive than many of the  English independent companies. I then sent the copy shop version out to NetPrinters. That cost another £5.00 as the different cup sizes (B,C & D) were all in the same file ( Jennifer has said she will look into this) and then I printed out 15 pages of instructions which makes this the most expensive pattern that I have ever bought!

The first hurdle when making your dress is choosing the size and I have to say that I found this incredibly stressful to the point I almost jacked in! There are good instruction on how to decide on your cup size but after that it is a bit like pot luck as to what you are supposed to do with them. My bust came out at 91.5 and should of been a C cup which as far as I could work out would put me in the size 12 but the closet measurement was a size 12 B cup and then when it was finished it would add another 5 cm all the way round. so I took a deep breath and decided to make  the size 10 C cup.

Having said that the illustrations are incredibly detailed and the rest of the step by step instructions are articulate and easy to follow. Jennifer shares tips that I have never seen in any other pattern ( all of which would be very useful if you were new to sewing). She includes a glossary which again is very helpful, although the words "see glossary" in places might be good .


The pattern is very well drafted and all fits together really well ,


the collar was a dream to fit together, (so much easier than the Rooibos for which I still have nightmares about) my only gripe was the pattern markings, there aren't very many .

It would of been really good if the notches were a bit more visible. I think a lot of the indie companies use the same software, but the darker triangles  that you find from big companies are so much easier to trace (these must be virtually impossible for the partially sighted) . Also, although there is information about how to lengthen the pattern, the actual pattern doesn't have a "lengthen here" line, that would be nice.


So the fit you ask, well the size 10 is a very good fit in the back, waist and sides, however I didn't need the C cup. Wearing the bra that I measured in it was very baggy around the boobs ( not a good look)  I ended up lengthening the pleats and with a padded bra it is still a bit baggy but looks pretty good !


Did I make it exactly as the pattern? No I didn't add interfacing as the facing fabric that I used was a lot stiffer than the fabric for the dress I omitted the pockets as my fabric is too fine to withstand that kind of strain an I also lined the skirt for modesty as my fabric is very sheer!


Would I make this again? Yes ( although in a smaller cup size)
The instructions were very clear as were the diagrams and I didn't have to re read anything.
It was a quick easy make and  I really love the finished product. it is feminine and could be dressed up or down. There are also two other necklines to choose from so you are fairly spoilt for choice . I really  fancy a wool one for winter, maybe with piping.

Was it difficult? No although it specifies intermediate sewer, a brave beginner could take this on as the only fiddly bit is the zip.

Would I recommend it? Yes although it is quite a pricey download, the quality of the instructions and tips makes it worth while for both beginners and intermediate sewers.You also have a couple of different necklines to choose from which means you definitely get value for money.


So that is my review . Did you find it helpful? Will you make it? Let me know!

Other posts you might like

Related Posts Plugin for WordPress, Blogger...